Monday, July 7, 2014

Black Distressed Bathroom Cabinets Tutorial

For the love of cabinets! These hideous 80's golden yellow orange cabinets I have longed to see disappear are finally actually making me smile. 

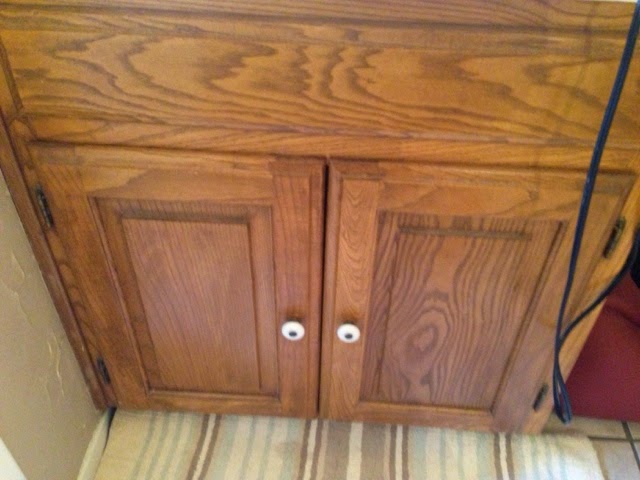
I forgot to take a before picture but they all look the same & are quite similar to this picture. Those knobs have to be antiques by now right?!


So first wipe down your cabinets of any dust, dirt or grime. Take doors off the hinges by unscrewing them with your electric drill. Remove all hardware. 

Next up your going to sand all cabinet doors front & back & the cabinet facing. Basically you're trying sand the shine off. You don't have to sand all the way down below the stain. I used this hand held DeWalt sander that was purchased at Lowe's.


After doors & facing are sanded. Be sure to wipe them clean of any dust, dirt or particles you wouldn't want mixed in with your paint. 

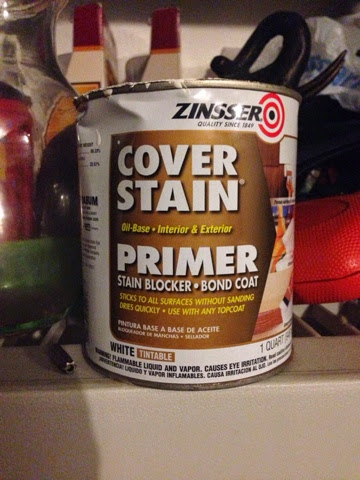
Next you're going to prime your cabinets doors & facing with a primer. I used Zinsser Cover Stain, Primer Stain Blocker. Purchased at Lowe's. I only used one coat but depending on what you're covering just use your best judgement. 


So I primed everything up & went to bed. Will start again tomorrow morning.

Finally the paint. Here is comes but first off be sure to mask everything off with painters tape don't want anything bleeding through. 

Paint I used satin interior Valspar Signature Paint + Primer in Cracked Pepper which is the darkest black lowes carries so said the paint guy.


I used a this roller as well as a paint brush for the grooves. 


The cabinet door behind this roller is what the door looks like before you sand it. 

So granted I am doing this in the heat of the day during the good ole Texas Summer which means it's blazing hott outside everything drys a little quicker.

I painted the first coat of black on all the doors outside in my garage, went in to paint the facing & by the time I came back out that side was dry enough that I could flip it & paint the other side. I waited 4 hours before adding a second coat. Then let all the painted cabinet doors & facing dry for 24 hours before I began sanding on Monday evening when I got home from work. Only got one cabinet door accomplished this evening b/c my husband had a golf tournament which meant I had to entertain our two year old whom is highly allergic to Mosquitos yet they love to feast on him in the evenings so we refrained from outside, but I am highly pleased with how it turned out.


This is the sanding block I used to distress my cabinet to perfection. Ha! It's only to my satisfaction whereas everyone's is different so just sand to your hearts desire. You do however want to make sure you sand past the primer though. 


Ok this is as far as I got today b/c Mr. Case as always trumphs any & everything so until tomorrow.....Goodnight!!

7/13/14   8:23pm

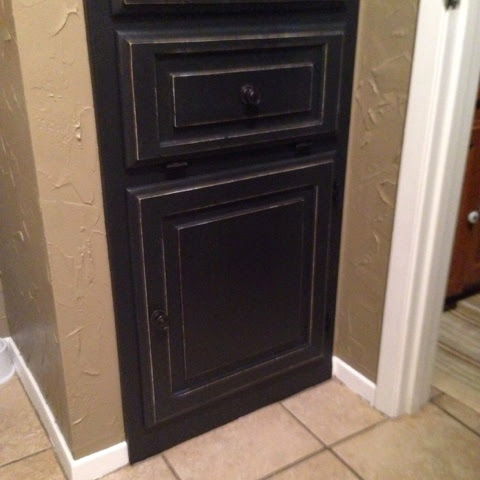
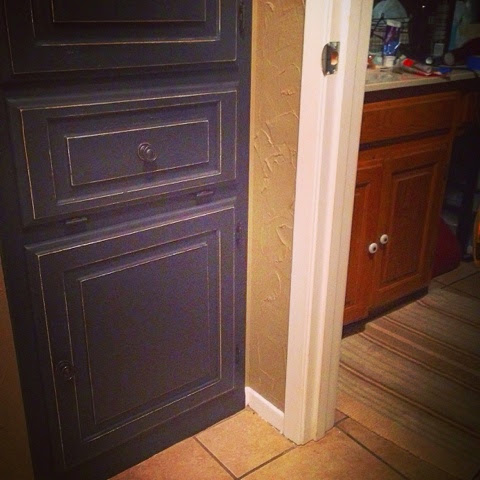
Good evening all, finally got around to finishing up my cabinets this evening. They turned out even better than I ever imagined. 


I did end up going over them after I was finished sanding with a Minwax wipe on poly in a clear satin finish.


Let poly dry for 24 hours. Put all your hardware back on & hang the doors & viola....stare in amazement for hours & smile every time you flip the light on....I do. =)

Thanks!
Let me know if I can help.


^^^^great picture to see the two side by side as before & after painted. Awesome huh.
Master Bathroom (toilet & bathtub area)

So my Master Bathroom (toilet & bathtub area) makeover consists of the following....

✔️- clean the entire bathroom
✔️- organize the cabinets
✔️- re-do shelf paper
✔️- caulk trim molding
✔️- paint the trim molding
✔️- paint the walls
✔️- paint the cabinets
✔️- new shower curtain
✔️- new bathtub rug
✔️- new wall decor
✔️- window treatment

As you see the ✔️ marked off that means it's been completed & I shall post pics soon with details. 

So I started with giving this room an overall scrub down! Cleaned everything to toe. Wipe down all base boards, shelves, trim, cabinets, tub, toilet...yuck! 

Next I caulked our trim molding. My husband cut & put this up uhh possibly a year or two ago. Lol yes it's been a work in progress for THAT long. Sad huh.

Okay so I caulked the trim with this. Purchased it at Lowe's. 


Next I painted the ceiling, trim & baseboards with an ultra white flat interior paint. This was also purchased at Lowe's. I used Valspar Ultra paint + primer. That's like the following below. 


Let the ceiling & trim paint dry for 24 hours at the very least. 

Next I taped off off my trim, base boards, bathtub tile & cabinets & painted my walls. I used an eggshell interior Valspar Signature paint + primer in the color PARK FOUNTAIN. Also purchased at Lowe's. Looks like the following below.


The color went perfectly with our tile in our shower/bathtub. It brightens the room & makes it look a lot bigger than the actual small space that it is. You can't quite put your finger on the color asking yourself is it taupe, gray, a brown, just what the heck is it. Whatever it is it goes great with EVERYTHING.


The shower curtain I purchased I had previously seen before but couldn't find. I did finally locate it on EBay thankfully. But it was originally WestElm.com, the Scribble Lattice white & gray shower curtain.


West Elm picture...


My bathroom...

Next is the rug that I also purchased at West Elm however it hasn't arrived yet. The Recycled Jersey Bath Mat. 20x34 in Slate for $29, I really wanted white but it's not too practical with a two year old.


7/25/14

Got all the decor up yesterday. Shade has been ordered & will ship July 30th. I can officially move on to the next room.


Pretty cute huh!

Master Bathroom (toilet & bathtub area)

My summer remodel/finish our house completely mission began with our Bathroom also the Master Bath (toilet & bathtub area). I am completely cleaning, organizing, decluttering, painting, updating, you name it it's happening. So the bathroom started out this orangey somewhat of a pumpkin color accidentally. My husband saw this dark burnt orange color in a buddies parents house & loved it & wanted to it in our however their trim was a dark stain ours was white, their tile was dark ours was light. It was a disaster period the end. Problem is we started this bathroom remodel some time ago & it's only been 1/2 finished for a couple years b/c we've been to busy to do anything with it. Well the time has come & momma here is finally tired of the 1/2 finished house.

So here's a few pics of what our bathroom looked like when I started. 


Yes! That orange is just as terrible in person as you are thinking it is in this picture. Blak! 

I forgot to take a before picture of the cabinets but they looked something this.


Yes that awful orangey/yellow golden oak or whatever 80's awesomeness they used back then & those horrible knobs that everyone has owned at one point in their life.

So stay tuned for more pics....

My Mission

So in my mad attempt to clean, organize, declutter, brighten & freshen our house I started in our bathroom (which is at one end of our house) & I'm working my way to the other end of our house without moving on to the next until the current room I am working on is COMPLETELY finished. I predict this should be completed in the near 2030 future. Ha!

Monday, January 20, 2014

Workshop Floors (Top Coat)

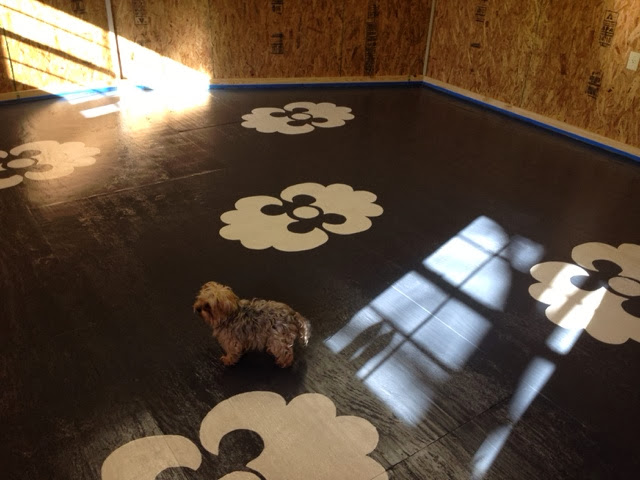
Oh the last step of this floor journey. Thank The Lord!!! Sunday morning I painted the top coat to my floors with a glossy polyurethane. I was a little concerned with the bubbles it leaves after applying but no worries they go away.


I went around edges & corners with a paint brush first then rolled on the remainder of the building. 


 Be sure to paint yourself out the door & collect your belongs as you approach that side & head out the door. Unless you want to leave them in there all night.


Clean up & let them dry over night & viola!!! Beautiful floors the next morning. 


Sorry for the glare & naked baby. I was anxious to go check on them. 


Case LOVES them!!!! He gives them a 👍!! 


Can't wait to move in now. Guess I will leave them be till next weekend so they can really cure. I haven't figured out yet what I'm doing to the walls yet so they will be next.

Workshop Floors (Painting the Stencil)

Well Saturday night consisted of painting my stencil finally onto my floor. I taped the stencil down with blue painters tape to help the stencil not move around while I was painting. I chose to do 5 stencils total. I didn't want to cover my floors in stencil just a little pattern here & there.


The first stencil was the best of them all. As it got later & the more tired I got my stencils were less than perfect. I was going for perfect though. I didn't want it to seem as though I tried too hard. I like the look of imperfections, I just have a hard time not doing things 100% so the wine helped with that lol. See below. No worries I will touch that up in the morning.


Finally finished. Will let dry tonight & do the top coat tomorrow morning. The end is near.

Workshop Floors (Making Stencil)

So I had hubby stop our local appliance shop & he brought me home a dryer box. Perfect! Thanks hubs!

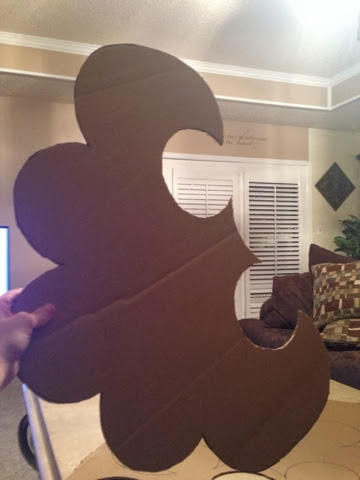
I used mixing bowls for there perfect circles to draw out my stencil. I also used a pencil to draw it out.

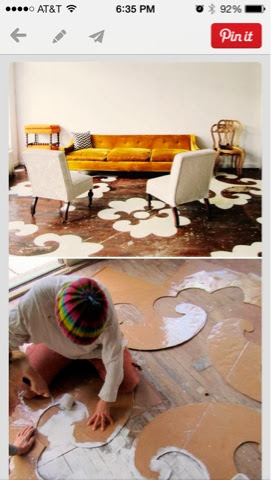
My stencil inspiration came from the Pinterest post below. 


After I finished drawing it with pencil, I went over it with a black marker so y'all could see. See above.

I then began cutting it out with a kitchen knife b/c my exacto knife was ????? Who knows where. See below.


After cutting out my stencil I began covering it in packaging tape so that when painting it didn't soak up the paint in my cardboard box. See below.


You can see the glare there once finished.

Off to bed so I can begin painting my stencil tomorrow. Yawn!