Saturday, November 10, 2012

Check out my two new teeth!!!


Personalized Wall Sign

Made this sign for my bestie as a wedding gift.

Supplies needed:
Cricut Machine
Black Vinyl
Mod podge glue
Paint brush
Scrapbook paper
Framed sign (I purchased at Hobby Lobby)


Use your cricut machine to cut whatever name you choose. Cut your scrapbook paper to fit inside your frame. Lay your cut out vinyl name on your scrapbook paper. Use the paint brush to brush your modge podge glue onto the inside of the framed sign, once you have glue covering the center lay your scrapbook paper down in the middle. Be sure to get all the bubbles out from where the glue gathers under the paper & Viola!! Hope she likes!!
And my own personal sign for my house since I was already making one. Lol can't leave myself out. =)

Sunday, November 4, 2012

Mini Deep Dish Pizza's

Mini Deep Dish Pizza! YUM! 

Ingredients:
pillsbury pizza crust
tomato sauce
shredded cheese
 pepperoni's

Press the pizza crust dough into the cupcake pan, spoon in tomato sauce, topped with cheese and then pepperoni-- SOO easy!!! Put in the oven on 400 degrees for about 10 minutes or until dough is done & golden brown & Viola!!! Yum yum & kids love them, even my big kids. ;)


Baked Egg Cups

Baked Egg Cups

Ingredients:
12 Eggs
12 thin slices of deli ham (round)
1/2 Cup of your favorite cheese (I used colby jack)
1/2 Cup diced onions
Salt and Pepper
Preheat the oven to 400.  Spray a muffin tin with cooking spray.  Lay a piece of ham in each hole creating a little ham cup.  Scramble your eggs in a bowl & pour into each hole and sprinkle with salt and pepper.

Bake the eggs for about 12 minutes


Personalized Tumblers for Case's Teachers

Made these cute Halloween gifts for Case's nursery teachers at daycare.

Materials:
clear acrylic tumblers w/lids
 orange & black vinyl
ribbon
a cricut machine

Create your names & polka dots in the Cricut Craft Room, cut your vinyl, place names & dots on glasses, tie your ribbon in a bow & Viola!!


Halloween Cookies In A Jar

Halloween Cookies In A Jar

You need the following for each jar:
1 quart sized glass jar
1 2/3 cup flour
3/4 teaspoon baking soda
1/2 cup white sugar
2 cups m&m’s (I used the fall colored m&m’s)
1/2 cup packed brown sugar
fabric, ribbon, printable labels

 Combine the flour, sugar and baking soda. Place 1/2 the mixture in your quart sized glass jar and pack firmly. I used the end of a rolling pin to help me pack my mixture tightly in the jar. Next, place the m&m’s (reese’s pieces would also work and look festive) in the jar. Pack the brown sugar on top and add in the remaining flour mixture on top. Make sure to pack, pack, pack or it won’t all fit.

 Place a lid on the jar and now we’re ready to add some crafty touches to it. Cut a small square of fabric to fit over the lid and tie a ribbon 
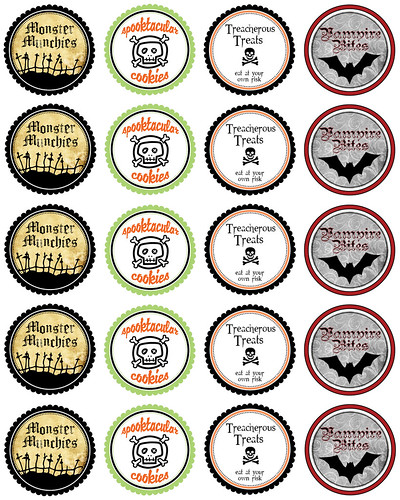
around it to hold it in place. Print out the labels on cardstock and use double sided tape to attach to the jar (or you can print on 2” round label paper from HERE).
Download the FREE printable labels HERE.
Halloween_labels-1

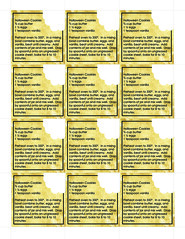
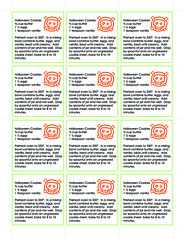
Attach the following instructions to the jar:
Halloween Cookies
3/4 cup butter
1 1/2 eggs
1 teaspoon vanilla
Preheat oven to 350°. Empty contents of jar into a large bowl. In a separate bowl combine ¾ cup of butter, 1 ½ eggs, and 1 teaspoon vanilla. Beat until creamy. Add to dry mixture. Drop by tablespoonful onto an ungreased cookie sheet and bake for 8 to 10 minutes. Erin also designed coordinating printable instructions for us.
Click on the pictures below to download the coordinating instructions.
recipe_monsterrecipe_spooktacular
recipe_treacherousrecipe_vampire 


Orange Burlap Wreath

Orange Burlap Wreath 

 Materials needed
 green styrofoam wreath
orange spray paint
orange burlap ribbon
screw driver
hot glue gun
ribbon of your choice

I spray painted my styrofoam wreath orange in case any of my wreath showed through it didn't show green. I cut my orange burlap ribbon in 4-5 inch strips. Use the screw driver make little holes in the foam wreath. Fold your burlap ribbon in 1/2 & then at the folded part twist it around to fit in the hole you make in wreath with the screw driver. Fill the hole with the hot glue gun & stick the twisted burlap ribbon inside. Do this all over the wreath but leave the back open so that it'll sit flush against the door when you hang it. When you've finished take the ribbon of your choice & tie a bow wherever you see fit & viola! I used the black w/white polka dot ribbon for Halloween & then just recently changed out to a cheetah print for Thanksgiving. As you can see below. This is my first & last burlap wreath making as it is a timely project, well its timely when you can only work on in the evenings after you have put your infant to bed lol.


Wreath after I changed the ribbon for Thanksgiving.

Thursday, November 1, 2012

Mummy Onesie

Made this Mummy onesie that I found on Pinterest for Case to wear to daycare on Halloween.

Materials needed
white onesie
medical gauze
 pair of wiggly googly eyes
white tread
scissors
pins
hot glue gun
Lay your onesie flat, wrap your gauze starting at the top left, back & forth working your way down the onesie pinning each wrapped row. Leave yourself about a 1/2 inch on the outer sides of your pins where you'll run the sewing machine down. After pinning the sewing machine down each side of the onesie on the outer sides that you pinned. Optional: run it across the top & bottom of the gauze so it doesn't get in there mouth or in there face. I just hot glued the eyes behind a fold of the gauze as Case was only going to be wearing this one time. You could also use fabric glue if you wanted too. Lastly take scissors & cut the folds of the gauze. They don't need to be perfect or even b/c again he's a mummy. =)

Case in his Mummy Onesie