Showing posts with label Chalk Paint. Show all posts

Sunday, October 22, 2017

Estate Sale: Antique Buffet/Sideboard Chalk Paint Makeover


Yall I have been searching long & hard for an antique buffet/sideboard. Call it whatever you want but I finally found one. THANKS to an Estate Sale on Old Bullard.  Granted its been setting in my garage awaiting for its sand down and fresh coat of chalk paint but what a better day than this afternoon for that to FINALLY happen. Say hello to my long awaited antique buffet. Oh how I love thee.


I chose Annie Sloan Chalk Paint just b/c that's what I'm used to using, it works great for me & its not let me down thus far.  There's lots of other options out there so use whatever your heart desires.


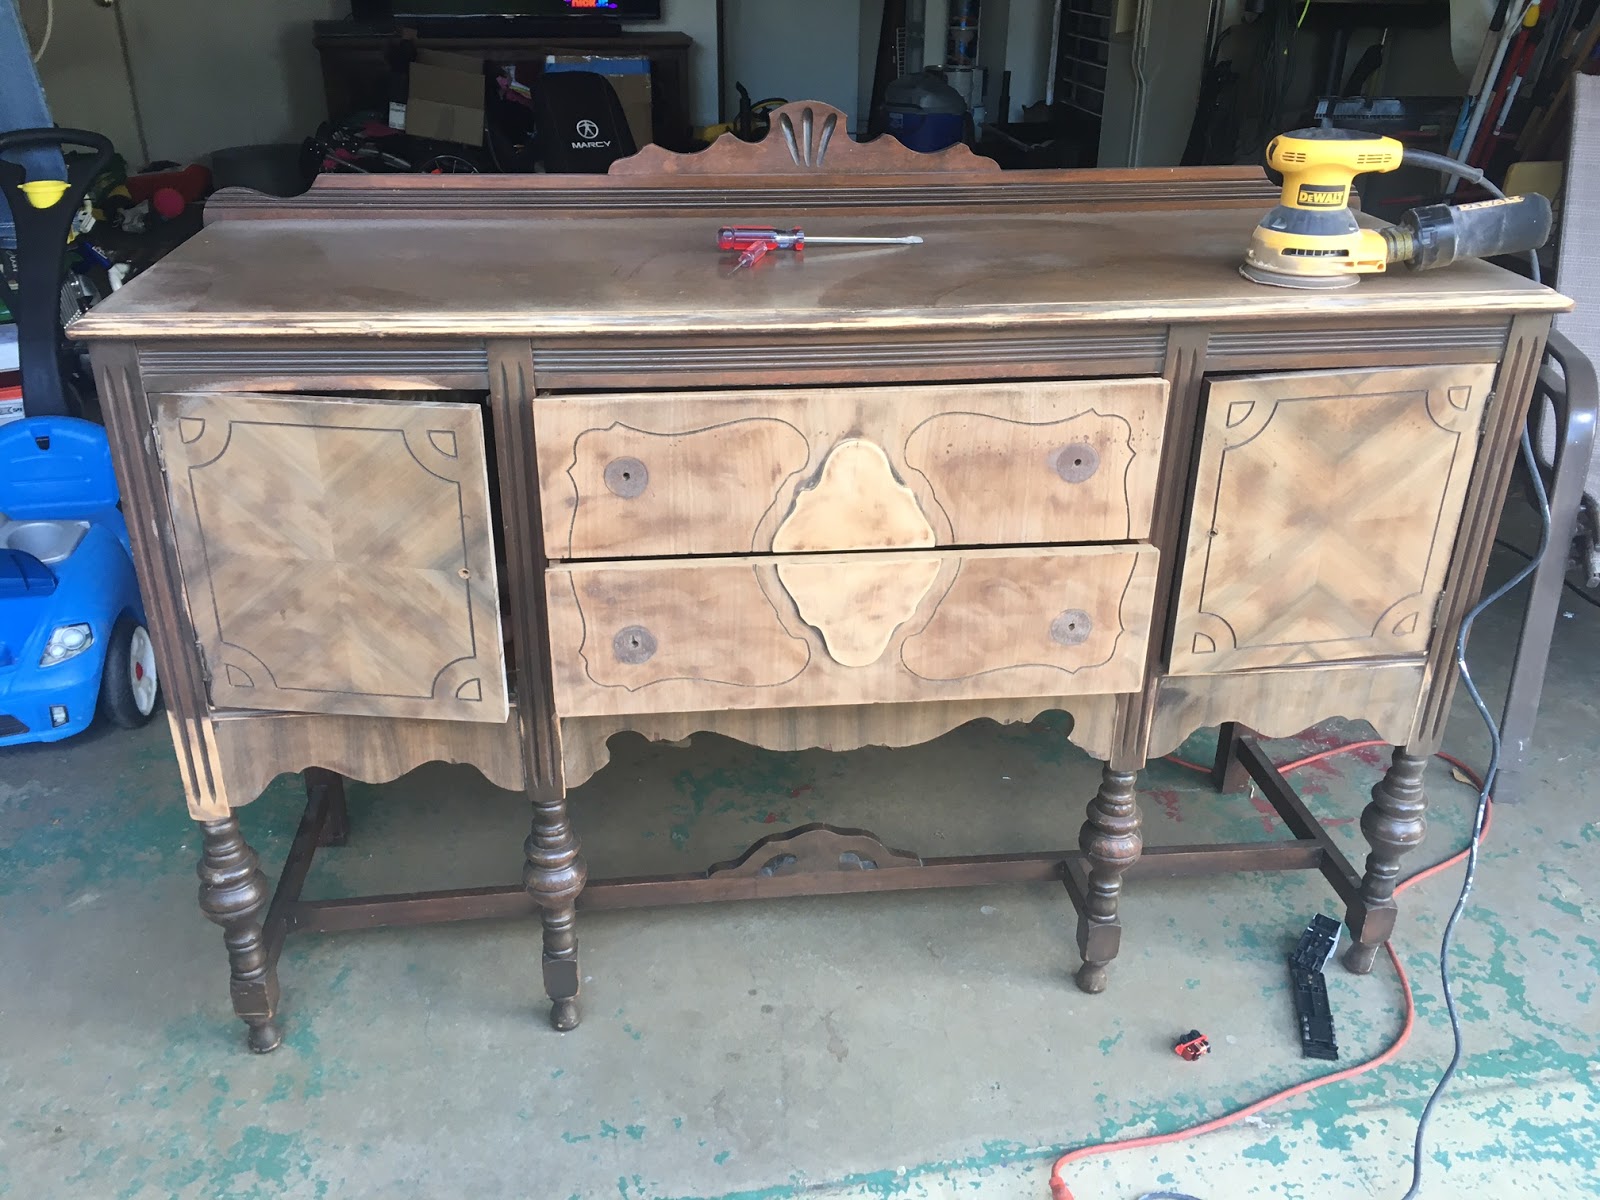
As you can see if had something I'm not even sure what it is built up on it. It looked years of wax or polish build up to me but who knows what it really is/was.  I sanded it off so it is no longer there.


I also had a little helper through the first part of this.  He wasn't feeling that great today but he wasn't bothering me either & it was less whining while we were outside so we just went with it until naptime.


So I started this project by sanding down the buffet & then blowing it off with the air compressor for any loose dust, followed by a good wipe down with a wet rag. Once finished it looked like the following below & was ready for the chalk paint.  As I already mentioned, I chose Annie Sloan Chalk Paint, in Old White. It has become my favorite.


I was mainly just trying to get the grime or whatever that was off before I began to paint.  Next I began to paint & got a solid two coats on before it was time to go in & give the boys a bath. So stay tuned & hopefully I will get updated pics on tomorrow, assuming I have time to finish it. MAJOR IF!!!! But hey a girl can dream right?!  I'm much to anxious to see the finished product so I might just make time.


After removing all the hardware I read somewhere that if it were brass you could soak it in fresh lemon juice.  Now granted I was fresh out of lemons, I did have lemon juice so I figured what the heck. It said to soak it for an hour & then use salt as a light scrub. Man the gunk that came off of those things was pretty amazing yet a little gross. But hey it worked! Unfortunately I forgot to take an after picture to show you just how well it worked but believe you me it did tremendously.


After two full coats of chalk paints I went back & distressed it with my sander.  I then proceeded to stain it with the dark wax as pictured above in every crease, nook or cranny.  It still wasn't enough for me so I took a fine tip paint brush & went over all the fine detail on creases on the front & then wiped it off with a old tshirt.  And I finally liked it!  And moved it into my dining room.


I'm kinda smitten.  The dining room has officially become my favorite room in the house just so I can sit in here & stare at it. 


Tuesday, October 3, 2017

Buffet Makeover with Annie Sloan Chalk Paint

This is what the Buffet looked like BEFORE!  Let me just say that I had been on the hunt for a tv console to get rid of that awful glass/metal man tv stand that some yahoo sold my husband way back when he didn't know any better at the tv store to sit his huge tv on.  My girlfriend was having a moving/garage sale & had posted it on facebook & there sat this little gem. I was like SOLD!!!!


Material needed for this project are the following:
- Annie Sloan Chalk Paint (or any chalk paint of your preference) I used Old White as my color.
- Annie Sloan Soft Wax, I used Clear & Dark wax. (Again preference, use whatever your heart desires.
- Paint brushes
- Paint Rags (old t-shirt also works great)
- Sander
- Screw driver or flat head to remove hardware


I began by removing all the hardware & then sanding the clear coat off as much as possible. 


Once all the hardware had been removed & buffet had been sanded you will want to wipe it down with a wet rag to remove any dust.  I also gave mine a good spray with the air compressor just in case I missed anything.  Next I began applying the Old White Chalk Paint until the entire buffet was painted.  Next part is the hardest part of it all. LET IT DRY!!!! Nothing I hate worse than waiting for paint to dry. Geez who has time for that.  I need to get on to the next project. Lets get this show on the road. Finally! Its dry! I guess I didn't get a picture of it after it was all painted but clearly you know it was all white.  Because I'm anxious like that I went ahead & put all my hardware back on so I could see the what it looked like and/or if I would want to reuse the hardware that it came with or replace it.  I opted to reuse the original hardware. 

Now you can either stop here & apply your wax if you like how it looks or keep going.  The next part I know stresses some people out b/c they are like what if I screw it up or don't like it. Umm...tough? I can't make that decision for you. I however knew the look I was going for so I proceeded.  And out came the sander.  I scuffed up the sides, the center, the top, the edges, you name it. After scuffing to your hearts desire, again wipe it down with a wet rag & blow it off with the air compressor. (Not necessarily in that order) Then I applied the dark wax.  It kinda gives it an aged look maybe even sorta dirty to some people. But I like it.  Let the wax set & in a day or so go over it again with the clear wax which is going to give it that smooth finish.

(You might want to note also that the dark wax goes on pretty heavy & dark. So you might want to try it on a practice board or in a spot that won't be seen much on the actual buffet to see if you like it & want to continue. If it's too heavy, you might try doing the clear coat of wax first & then coming back & doing the dark wax over it as it doesn't go on so dark & you're in a little more control.)